Mount Your Center Speaker on the Cheap
A quick mount for your center channel, no wall damage required.
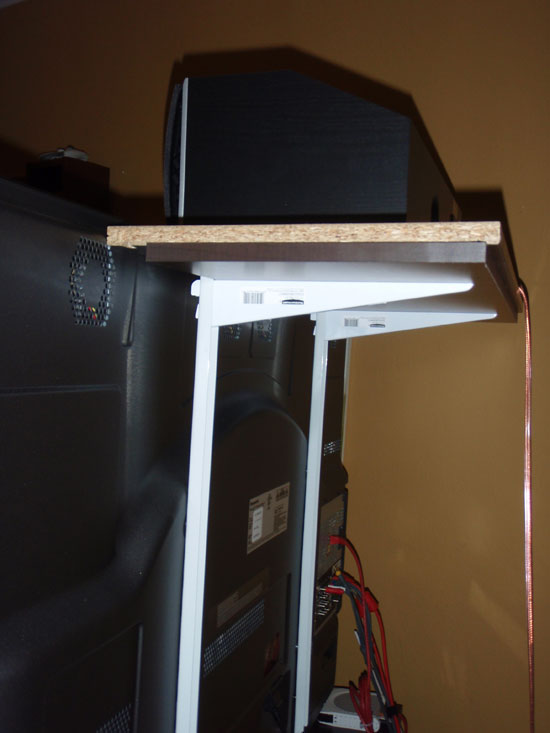
The mounted speaker resting on the shelf above the television
Santa was gracious enough to deliver a Polk CS2 center speaker for my home theatre system last month. This provided one more step down the upgrade path from my original Onyko HT-R340, a budget 5.1 home theatre in a box. There was just one catch between me and center channel bliss – where to put it.
I knew the CS2 would be bigger than the speaker it was replacing, but that didn’t properly sink in until after it arrived. The previous center channel was just small enough to fit into the gap on the front of the console between the TV stand and the edge, while also being short enough not to block the screen. The CS2 does not share this trait. Even if I somehow managed to fit it onto the console, its length and height meant it would interfere with the screen no matter where I placed it.
Adding to the challenge, I’m currently renting with limited tools and workspace and was keen to avoid unnecessary damage to the walls.
The Fix
My first instinct was to find a shelf sturdy enough to hold the television with enough clearance for the CS2 to sit underneath, but nothing I trusted with the screen ever materialized. Then I ran across this post on AVS where an ingenious user bolted standard shelf brackets into the TV’s VESA mount holes. EUREKA!
I’m a bit paranoid and was concerned about the weight of the speaker, so I decided to tweak the idea. Instead of using standard shelving brackets, I opted for a modular wire closet shelving system. This allowed me to mount the shelving track across both pairs of VESA points rather than only the upper two, spreading the load a bit more evenly (at least in my mind).
My set is a 54" TC-P54V10 and these are the parts I used. Of course, verify your sizes based on the VESA standard your setup requires.
- (2) 30" shelving track
- (2) 12" shelving brackets
- (4) 8mm x 20mm screws
- (4) 8mm washers
- (1) Shelving , though you can save a couple of bucks if you want to use some scrap board.
Tool requirements are pretty minimal – mainly a screwdriver or a wrench/ratchet depending on your mounting hardware. The track I used came with pre-drilled mounting holes to attach to the wall, but the 2nd VESA point didn’t line up so I also needed to use a drill (with a 3⁄8" bit) to drill out the 2nd set of mounting points in the track.
It’s pretty straight forward from here:
Line up one of the pre-drilled holes with one of the VESA mounting points on the back of the television. Try to get the top of the track should sit as flush as possible with the top of the television set.
Using a screw and washer, connect the track to the back of the television into a VESA mount point. I would recommend not over-tightening the screws, 1⁄4 turn past hand tight should be enough.
If the track you’re using doesn’t have a pre-drilled hole which aligns with the 2nd VESA point now would be the time to mark the location. Remove the track and drill it out.
Connect the track to the 2nd VESA mount point.
Repeat for other side.
Once the rails are attached, add your shelving brackets and shelving material and you should be ready to throw the speaker on top.
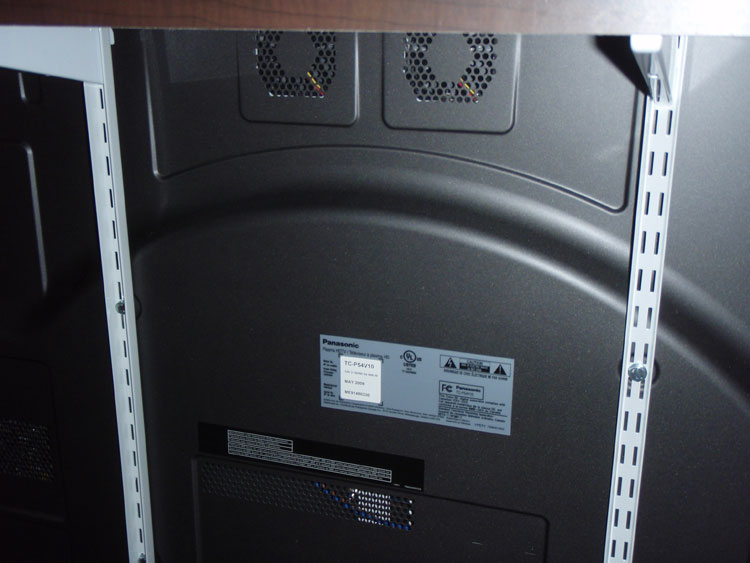
Shelving track attached to the VESA mounts on the rear of the set
The center channel, sitting on its shelf. I used two pieces of scrap shelving to get it the desired height.